

This guide explains how to take screenshots on a Windows PC. Instructions apply to Windows 10, 8, 7, Vista, and XP.
How to screenshot on Windows: Whole screen
Below are steps on how to capture an image of your entire PC or laptop screen:
- Press the PrtScn key (you may need to hold shift or function). The PrtSc key, which is short for print screen, is usually located on the top row of your keyboard.
- Alt+PrtScn: To take a screenshot of a single window that you are focused on, Click these buttons at the same time . Choose the window once to make sure it’s in focus, and then hit these keys.
- Win+PrtScn: Using the Windows key with the print screen button (in Windows 8 and newer) will take a screenshot of the entire screen and then save it in the default Pictures folder in a subfolder called Screenshots (for example C:\Users\[user]\Pictures\Screenshots).
How to Paste or Save a Screenshot
The easiest way to save a screenshot is to first paste it in the Microsoft Paint application. There are other options like to paste it in Microsoft Word, Photoshop, or any other program that supports images, but for the sake of simplicity, we’ll use Paint.
This is easy to do in Paint because you don’t have to download it, it’s included with Windows by default.
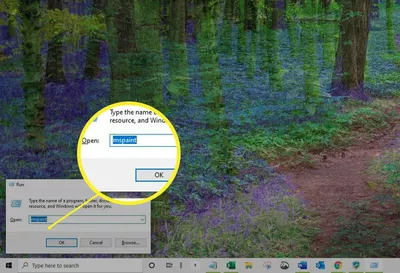
The fastest way to open Paint in all versions of Windows is through the Run dialog box.
- Press Win+R.
2. Type mspaint into the Run field, and click Enter.
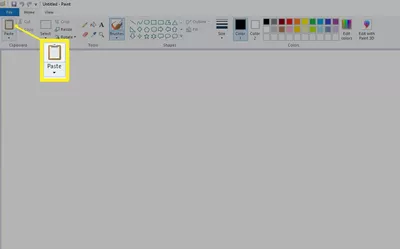
3. With Microsoft Paint open, and the screenshot still saved in the clipboard, use Ctrl+V to paste it into Paint, or select Paste.
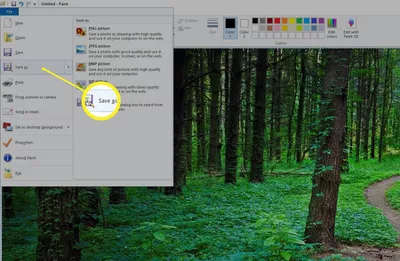
4. Press Ctrl+S, or click File > Save as to save the screenshot.
How to Take Screenshots in Windows 7, 8, 10 with the Snipping Tool
- All recent versions of Windows, plus 7, 8, and 10, contain the Snipping Tool. You can easily open it by looking for it in the toolbar search.
- To open the toolbar, Press the Windows key and jump to Windows search. Instead, you can also make use of the Windows + S shortcut to summon Windows search. But, note that in Windows 7, you must manually click the search field before you can type out the keyword. Type in “Snipping Tool” and press Enter.
Note: There’s no keyboard shortcut to open the Snipping Tool. It would be best to do that manually. In Windows 10, the updated version of this app can be opened with a shortcut more on that later.
- Automatically the program will open after pressing the Enter key and typing the correct phrase.
- It has several modes, including free-form screenshots, but the basic form is a rectangular screenshot shape. But at least it gives you more flexibility than just pressing the print screen key.
- Once you initiate the “Snipping” by tapping the “New” button, the entire screen goes gray. You can then choose the area you want to capture and save.
- You can now edit the screenshot with the pen, highlighter, and eraser tools. It also gives a few unique options compared to copying and pasting something into Paint, such as the Delay mode for taking delayed (timed) screenshots. You can also highlight something in the screenshot and email it directly from the Snipping Tool.
Download a Print Screen Program
Although Windows works perfectly for basic screenshotting abilities, you can however install both free and paid third-party applications for more advanced features like fine-tuning the screenshot by pixel, annotating it before you save it, and easy saving to a predefined location.
PrtScr is one example of a free print screen tool that is more advanced than the Windows one. WinSnap is also good but the free edition lacks some of the more advanced features of the premium version.


