

With the iPhone’s built-in camera, shooting videos couldn’t be easier but capturing the raw footage is only half the fun.

The Photos app enables you to elevate your videos to the next level by adding transitions, trimming and cropping clips, creating special effects, and much more. Let’s dive into three ways you can edit your iPhone videos and turn them into cinematic masterpieces.
How to edit videos on iPhone
You will need to identify a video before you can start editing but that’s easy enough.
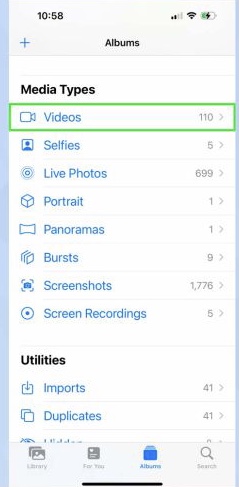
1. Firstly, you need to launch the Photos app on your iPhone and search for a video to edit. You can easily find videos if you click on the Albums icon at the bottom of the screen, swipe down and click Videos, which you’ll see under Media Types.
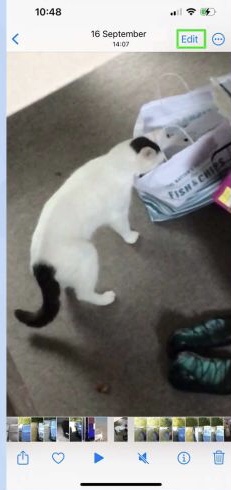
2. Now, with the video on screen, click Edit.
3. If you would like to trim your video either to simply make it shorter or to cut out any unwanted footage, click the camera icon at the bottom of the screen to show the timeline.
4. Then press, hold and move the two slides to the left and right of the timeline.
5. You will then see a yellow box around the footage that you are going to leave. Adjust the sliders until you are okay. You can press Play to see the trimmed footage.
6. When you are okay with your trimmed video, click Done. You can now choose Save Video in which case you will be overwriting the original file. You can also click Save Video as New Clip. This will make sure you leave the original video intact.
GET TO GRIPS WITH THE EDIT MENU
You can make adjustments to the video image itself. For instance, you can change the brightness, brilliance, shadows and even the rotation of a video.
1. Click on the adjustment icon
2. You can make use of the Auto option(it has an icon which looks like a wand) which allows you to quickly fix your video. Use the slider bar to adjust how intense you want the auto-edits to be.
3. If you would prefer greater control, however, explore the other icons to the right of the Auto icon by swiping left.
4. The first one you will see is Exposure. click on the Exposure icon and you can adjust the slider to the right to raise the exposure and brighten your video.
5. Adjust the slider to the left to lower the exposure and darken your video. You will see a number falling and rising as you make your adjustment to help guide you.
6. The next icon along is Highlights and you can make adjustments to reduce any excessive bright patches in your video. Click the Highlights icon and again adjust the slider to the right to lower highlights or adjust the slider to the left to lift highlights.
7. You can now brighten any dark areas of your video. Click the Shadows icon and adjust the slider to the left to raise shadows and adjust the slider to the right to lower shadows.
8. You can now continue to refine your video. click the contrast icon to increase the difference in tone of your video adjust the slider to the left to raise contrast and adjust the slider to the right to lower it.
ADD FILTERS TO A VIDEO
It is not difficult to change the overall look of your video by applying a filter.
1. To do so, Click on the filter icon.
2. Move left and right through the filters and click on a filter that catches your eye. swipe the slider left or right to see how it changes the image of your video.
COPY AND PASTE YOUR VIDEO EDITS
If you like the edits you have made to one video, you can apply them to another.
1. Click on the three-dot icon in the top right corner of the screen.

2. Now choose Copy Edits. You just need to open and edit another video, click on the three-dot icon again and select Paste Edits to make use of the edits you’ve made.

That’s all, You can now get cracking having figured out how to edit video on iPhone, but don’t worry if you make any mistakes. At any point during your editing, you can tap Reset to go back to the original video.


