

With iOS 16.1, you can set up an iCloud shared Photo Library that allows you and five other people to easily share and edit photos. Shared photos libraries are nothing new, of course, but with the iCloud Shared Photo Library feature, Apple is looking to simplifying the sharing process. And that includes the ability to save photos to an iCloud Shared Photo Library directly from the iPhone’s Camera app.
Below are steps on how to save photos to your iCloud Shared Photo Library from your iPhone’s Camera app.
How to save photos to your iCloud Shared Photo Library from the iPhone Camera app
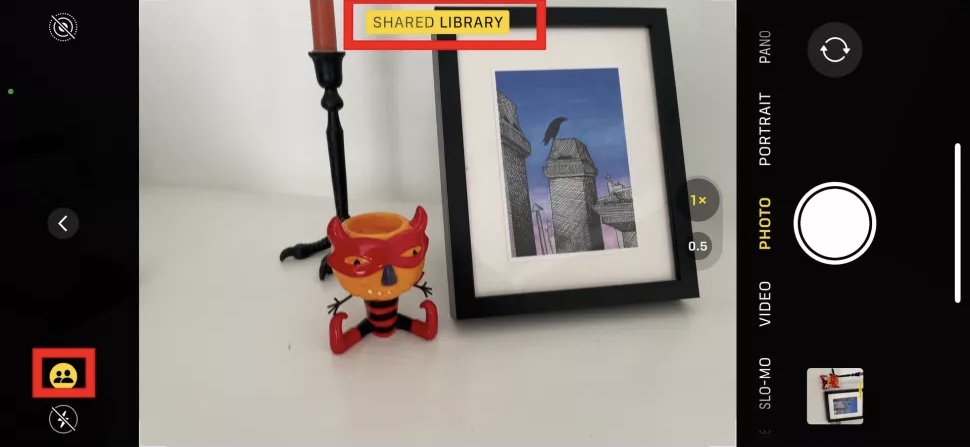
1. When you go take a picture in the Camera app, click on the icon featuring silhouettes of two people. (It’s located next to the icon for turning the camera’s flash off and on.)

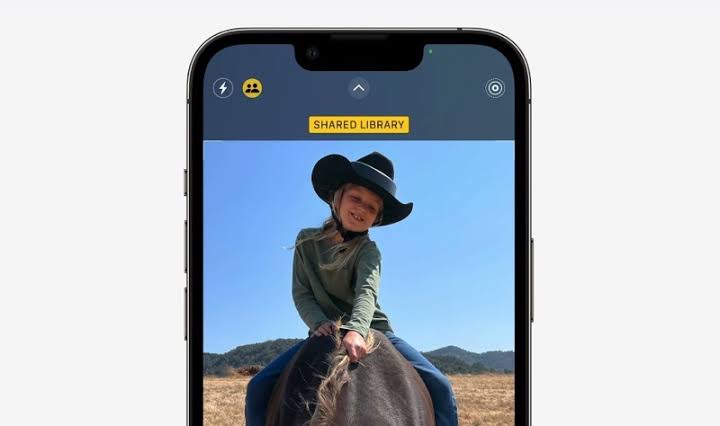
2. The silhouette icon will turn yellow when you click it. A Shared Library title will briefly flash across the top of the Camera’s view finder. Any photo you now take will be saved to your iCloud Shared Photo Library.
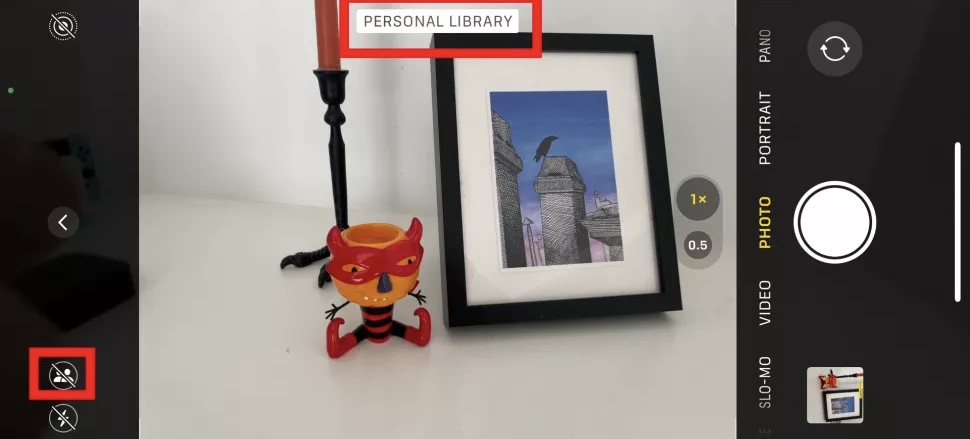
3. Click on the silhouette icon again to turn off the feature. A slash will appear through it, and the Personal Library title will flash in the view finder.
You can also move photos from your library into an iCloud Shared Photo Library. Here’s how that works.
1. In the Photos app, look for a photo you will like to save to your iCloud Shared Photo Library and select it.
2. Click on the drop-down menu by the person icon on the right side of the screen.
3. A Move to Shared Library option will appear tap on that.
4. The photo will now be marked with a two-person silhouette indicating it’s part of your iCloud Shared Photo Library; you’ll also see that icon superimposed on thumbnails of shared images in your Photos library.
In Conclusion, That’s all on how to save photos to your iCloud Shared Photo Library, whether you do it automatically or manually.


