

Knowing how to screen record on Windows 11 is very useful any time you need to document something in Windows that you want to show to others.
If you need to explain to a colleague what happens when you click a button on a website or show a family member how to do something on their computer, for instance, it’s nice to be able to record your screen and send them the video.
For a long time, screen recording was harder than it needed to be because Windows didn’t have any easy-to-use built-in tools. But that changed for Windows 11 users in 2023 when Microsoft added a new screen recorder function to Windows’ venerable Snipping Tool, which until recently only allowed you to capture screenshots.
This change is long overdue, and it vastly improves the usefulness of an already extremely useful Windows app. As a result, you need to know how to screen record on Windows 11 using the new Snipping Tool that’s what we’ll show you in this simple steps.
Note: This guide is only applicable on Windows 11 PCs running Build 22621 or later.
How to screen record in Windows 11
1. Launch the Snipping Tool
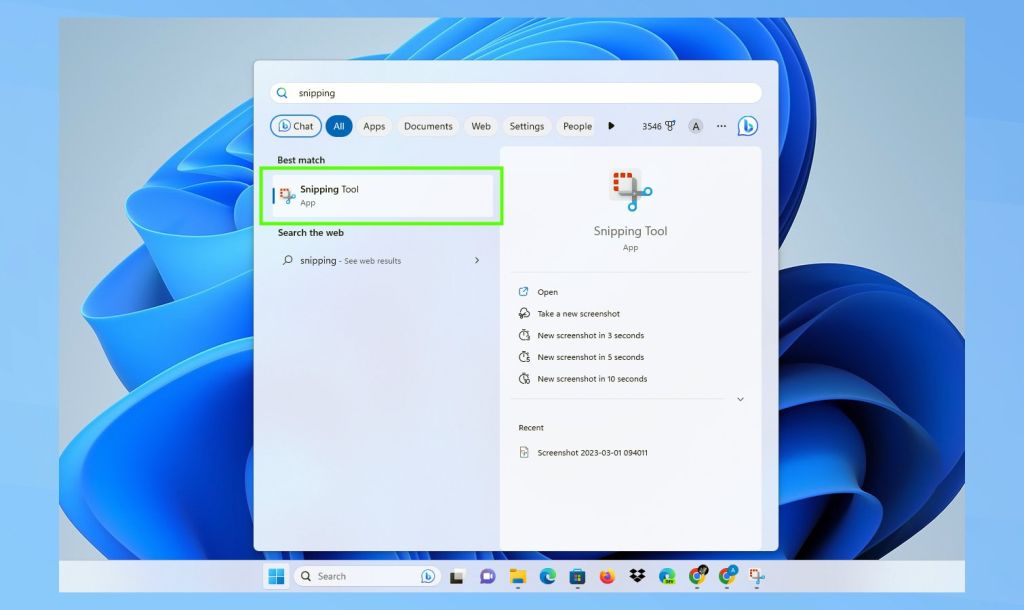
Open Windows’ Snipping Tool. The fastest way to do this is to open the Start menu by clicking on the Start button, then type Snipping Tool and press Enter when it is selected in the search results.
2. Switch to video capture mode
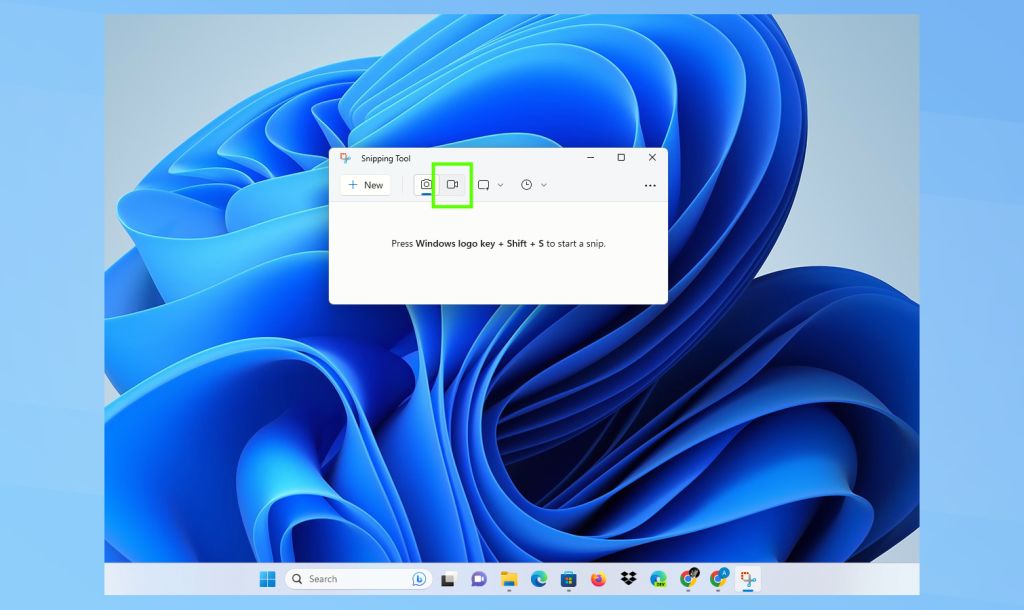
The first time you open Windows’ Snipping Tool, it will default to capturing screenshots, not videos. This is great for snapping pics of your desktop, but to switch the Windows Snipping Tool to video capture mode, you simply click the camera slider to slide it from the photo camera to the video camera.
3. Click + New to start a new screen record
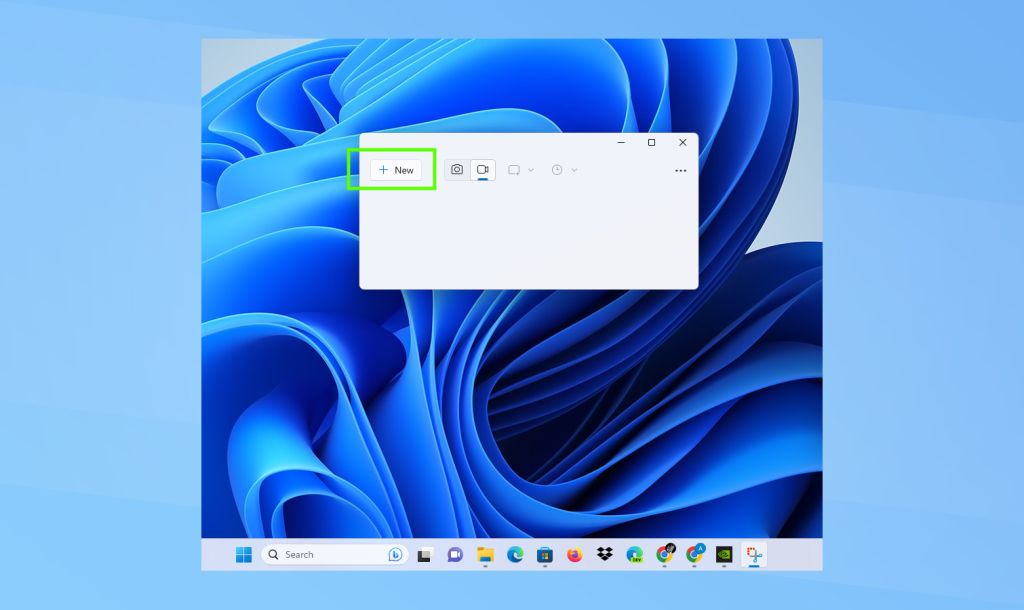
This part’s pretty straightforward, simply click the button that reads “+ New” to begin a new screen recording session.
4. Click + drag to highlight recordable area and hit Start
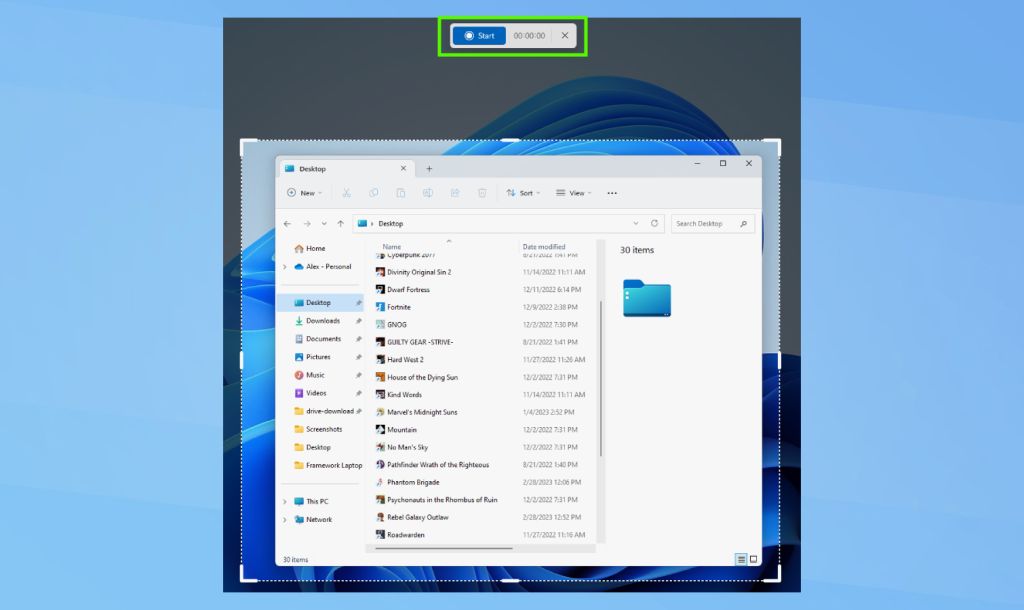
Once you start a new screen recording session, your desktop will darken and you’ll have the opportunity to click and drag to highlight the area of your desktop you wish to record. Don’t feel like you have to get it perfect on your first try; you can fine-tune the dimensions of your recordable area after you establish it by clicking and dragging on its borders.
When you’ve highlighted the area of the screen you wish to record, press the Start button at the top of the screen to begin recording. A 3…2…1…countdown will show on the screen. Once it’s finished, you’ll see the record button turn red as the recording begins.
5. Click Stop when you’re satisfied with your recording
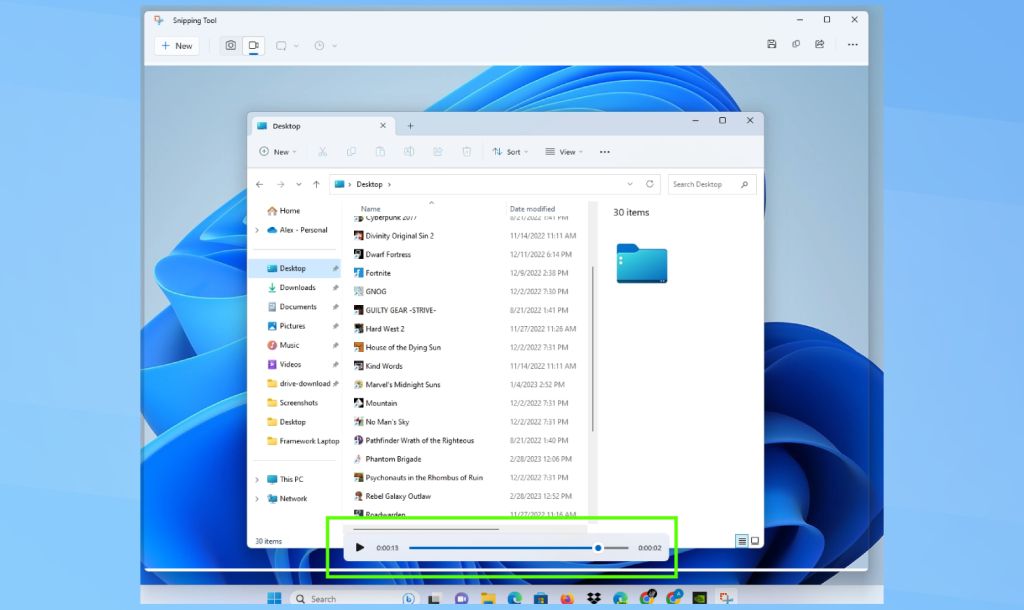
When you’re okay, select the Stop button at the top of the screen (in the same place where the Start button used to be) to stop recording your screen.
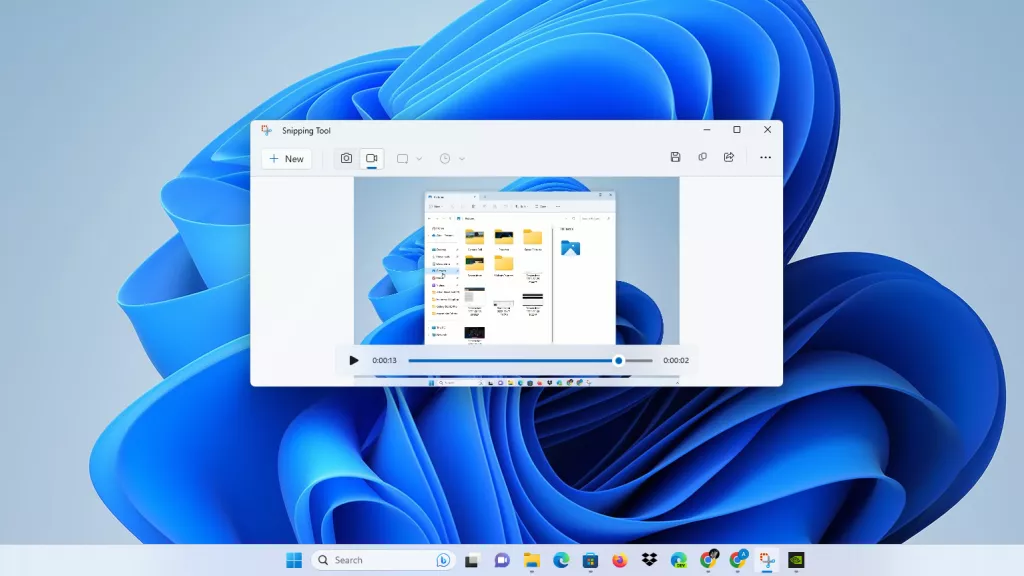
The Windows 11 Snipping Tool will then display your video with a timeline and playback controls at the bottom which you can use to watch what you’ve just recorded.


