


With hundreds of megapixels on smartphone cameras today, photos now have larger dimensions than what you need. But there are easy ways to get the right sizes in seconds.

This article will discuss some of the best ways to resize an image online. You can use these image resizer tools via a web browser on PC or mobile devices, and the experience will be more or less the same.
Resize an image on your Mac
We recommend launching preview if you wish to resize an image on an Apple Mac whether that’s the best MacBook, an iMac or a Mac Mini. This image and PDF viewer comes baked into macOS and it has several editing and resize options.
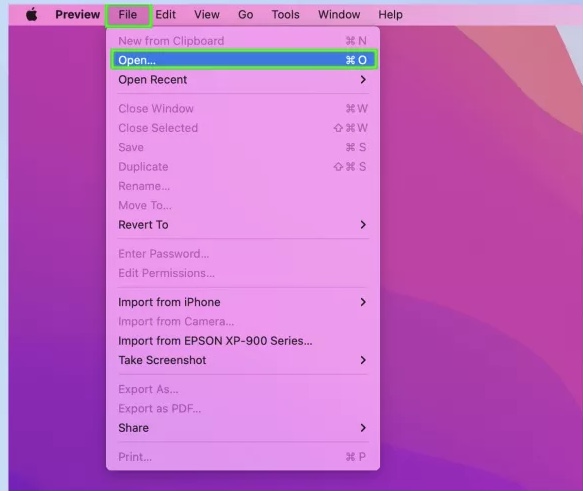
1. Launch Preview on your Mac and tap File in the menu bar. Click Open and look for an image you’d like to resize.

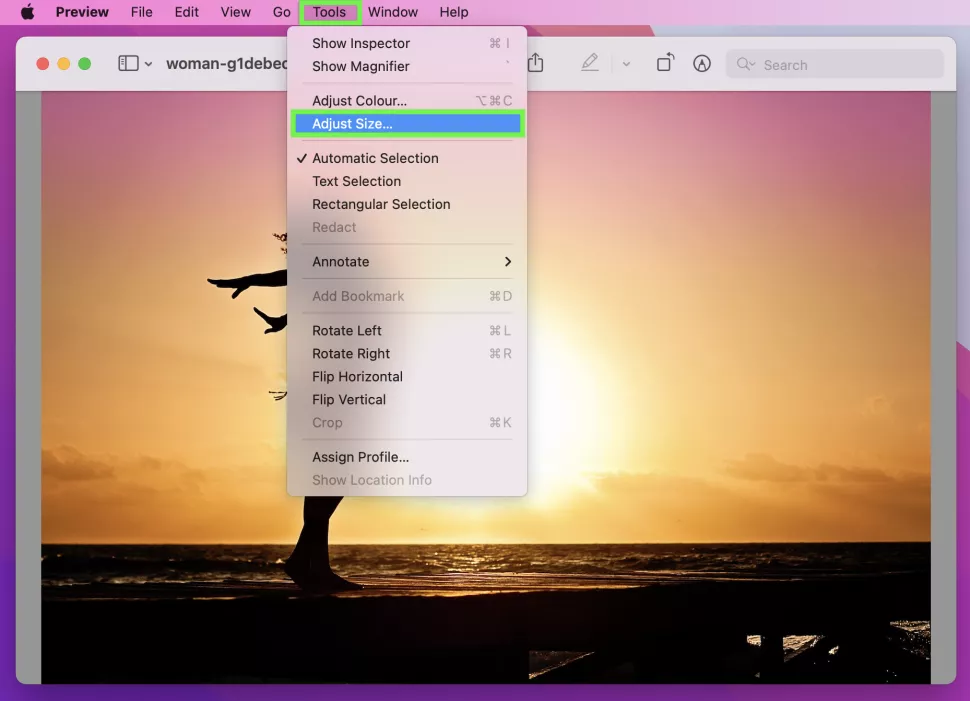
2. When you double-click the image, it will show in Preview ready for editing. You can click Tools in the menu bar and select Adjust Size.

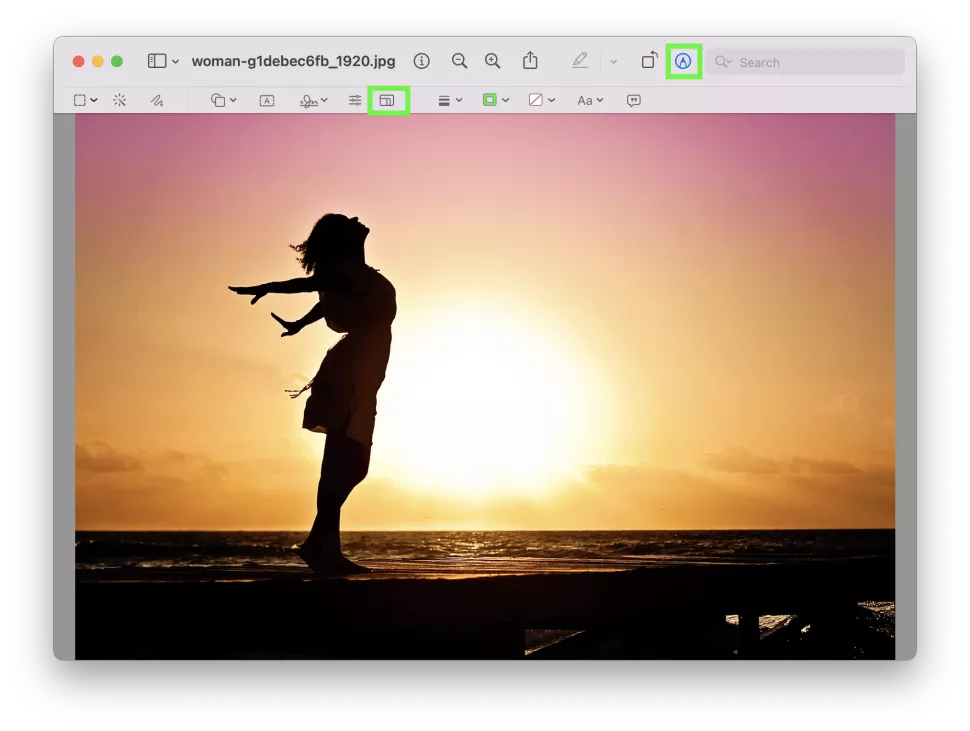
3. You can also use the resize options if you click the Markup Toolbar button in the Preview app window and then select the Adjust Size button.

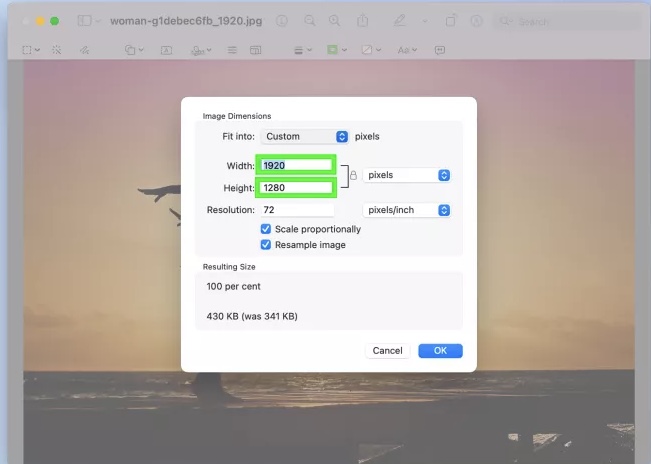
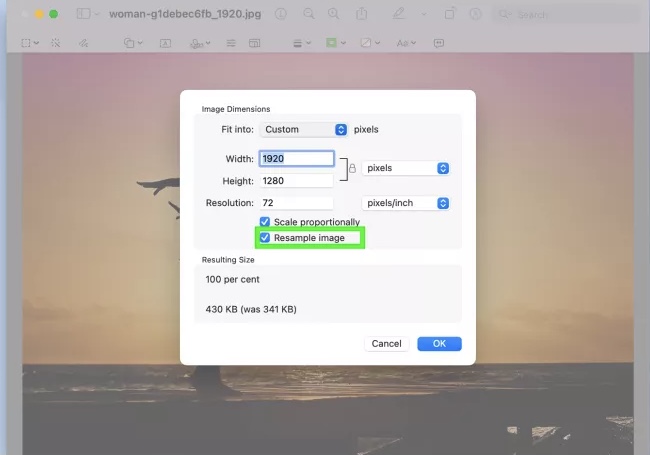
4. However, you will see the Image Dimensions window. The easiest way to resize an image is to click Custom next to Fit into. Simply select one of the sizes.


5. You can also manually alter the width and height of an image. Input a value next to width and enter a value next to height.

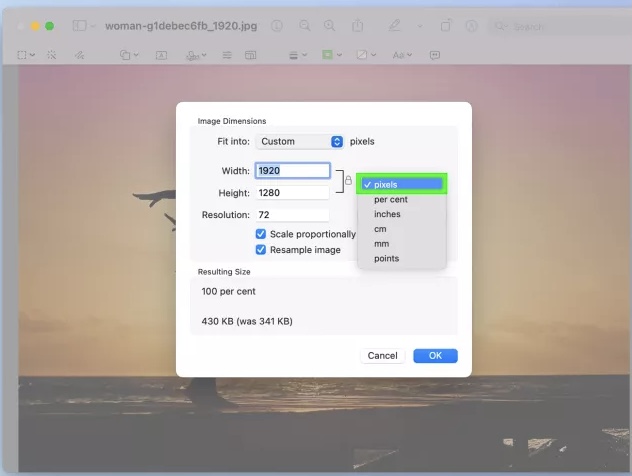
6. By default, the values will relate to the number of pixels but you can change this. To do so, tap Pixels and select an alternative method of measurement including per cent, inches, centimeters, millimeters and points.

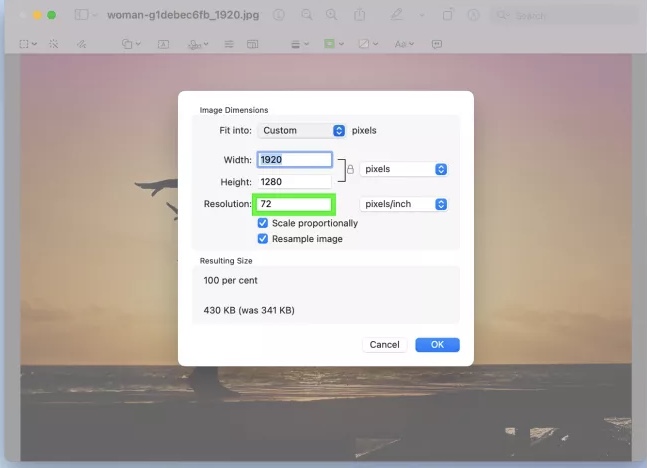
7. You can also change the resolution of an image. Usually, when sharing online 72 pixels per inch works best. They have a small file size too.

8. You can also decide whether or not you want to click Scale proportionally. By selecting this, the image will always maintain its original proportions. For example, if you enter a value in the width box, the value for height will automatically change to ensure the proportion remains intact.

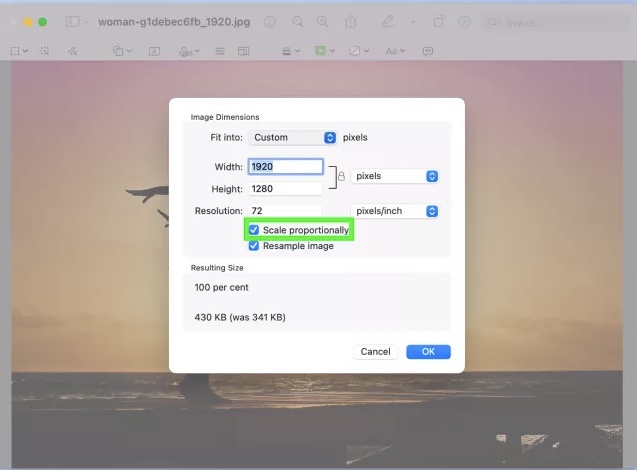
9. If you do not want your image to lose any detail, untick Resample image. Given that you will want a smaller file size for sharing online, you may want to tick Resample image instead.

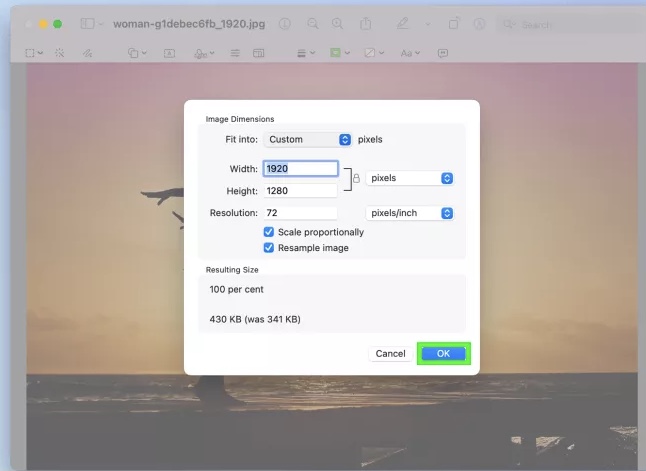
10. When you are done, tap OK. Now save your image (click File and select either Save or Export).

How to resize an image using the Photos app
The Photos app is probably the easiest way you can resize any image you want to. It’s very quick and simple, assuming you just want to resize a couple of images. Here’s what you need to do:
1. Launch the image you wish to resize using the Photos app.
2. Tap the ellipsis button on the menu bar at the top, the click Resize.
3. Select from the default size options provided. You can also select Define custom dimensions if you want to set a specific size.
4. Selecting custom dimensions also let you to change the aspect ratio of the image and set the final image quality, with higher quality resulting in a larger file.
5. Choose where to save the new image
That’s about it if you want a quick way to resize your images using the Photos app. You can save the image with the same file name if you want to overwrite the existing file, but you can also keep the original high-quality version.


