

Most Apple users will want to know how to upgrade iCloud storage. No matter how many IOS or MacOS devices you own, Apple ID gives users 5GB free cloud storage, You’ll probably use up that space quickly, at which point, you’ll have to purchase more if you want to save photos and other data securely on Apple’s servers.

When using an Apple device like an iPhone, iCloud gives you a seamless experience, it’s worth sticking with iCloud. You don’t have to think about it, but your photos and backups are automatically archived, making sure everything is safe while freeing up space on any Apple device you use.
Here we show you how you can upgrade to the paid-for storage tier via iOS (and iPadOS) or macOS.
How to upgrade iCloud storage in iOS and iPadOS
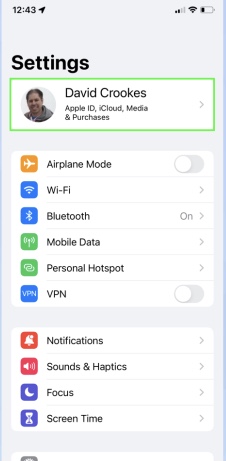
1. Open the Settings app on your iPhone and click on your Apple ID at the top of the screen. If this isn’t showing, then sign into your Apple account.
(Image credit: future)
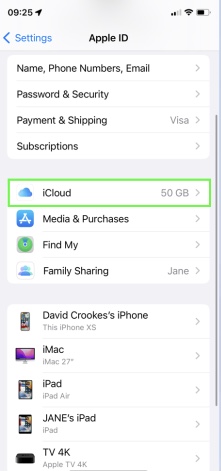
2. Look down the list of options and click iCloud. You can see your current storage amount here.
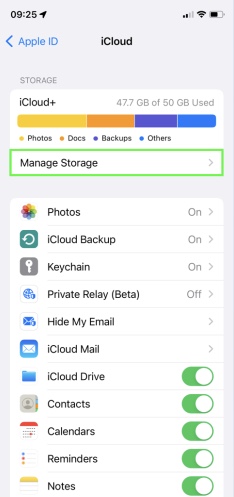
3. Check how much storage you are using with the bar graph: in our case we’re almost at the limit. If you feel you could benefit from more storage, click Manage Storage.
4. Now you will have two choice, You can click on Use Family Storage if you share an iCloud subscription with members of your Family Sharing group. This may have sufficient space for your needs.

Otherwise, just click Change Storage Plan to upgrade your individual iCloud storage.
5. Apple will show you how much you are paying for your current plan and when it’s due for renewal. To add more, choose one of the other tiers and tap Buy.
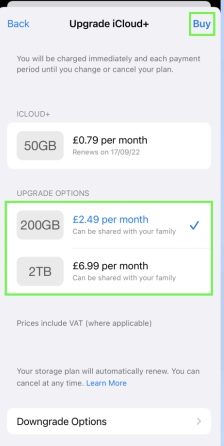
If you select 200GB or 2TB, this space can be shared with your family. Your storage plan will instantly switch and you will be charged the difference immediately.
How to Upgrade iCloud Storage Plan from Mac
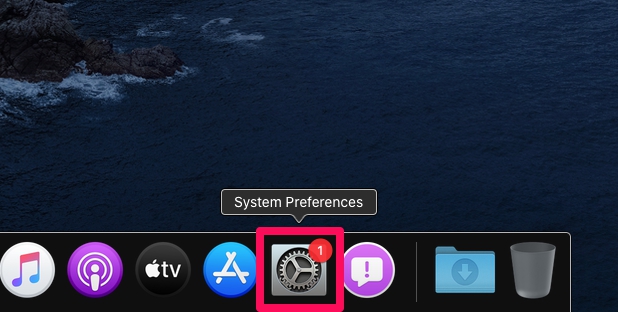
1. Choose “System Preferences, from the apple menu, or click on “System Preferences” located in the Dock.
2. Your System Preferences will be opened on your Mac. Make sure you are signed in to your Apple account. If not, you will have the option to sign in right here. Click on the “Apple ID” option located at the top-right corner, as shown below.

3. Next, go to the “iCloud” section on the left panel. and tap on “Manage” as displayed in the screenshot below.
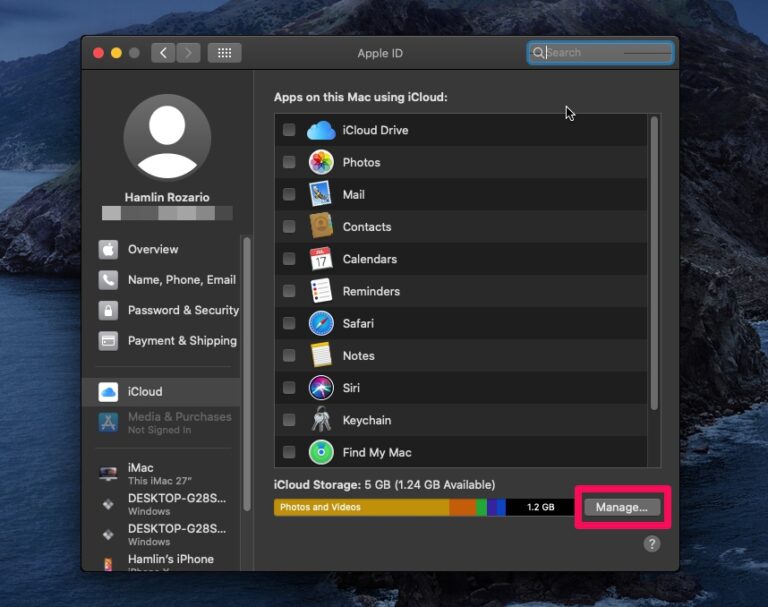
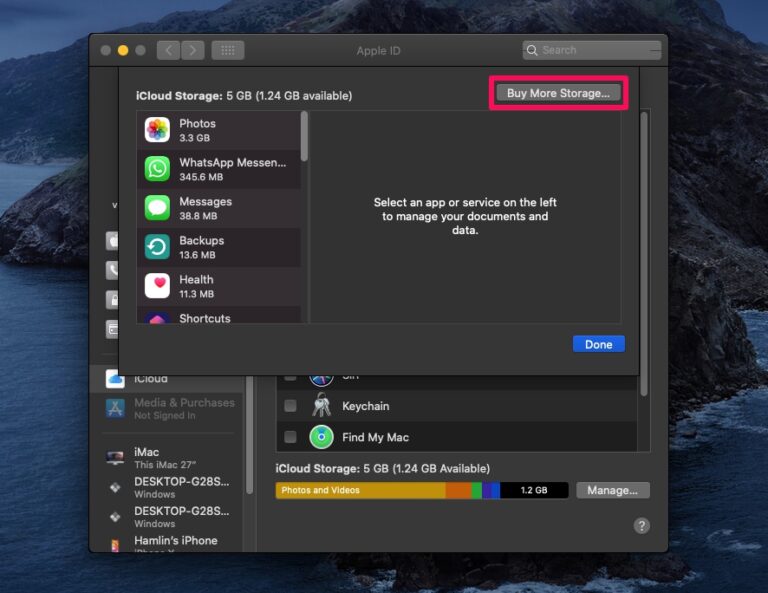
4. Here, you will be able to see which apps are using your iCloud storage. select “Buy More Storage” to upgrade your plan.
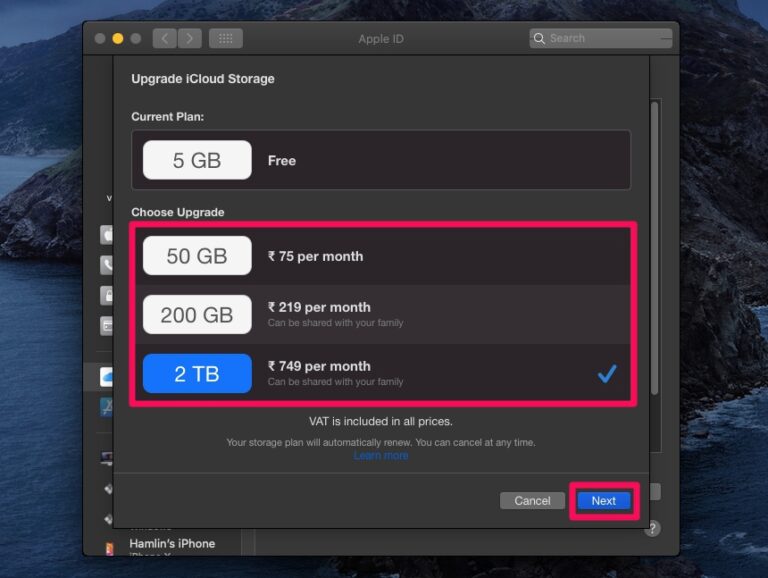
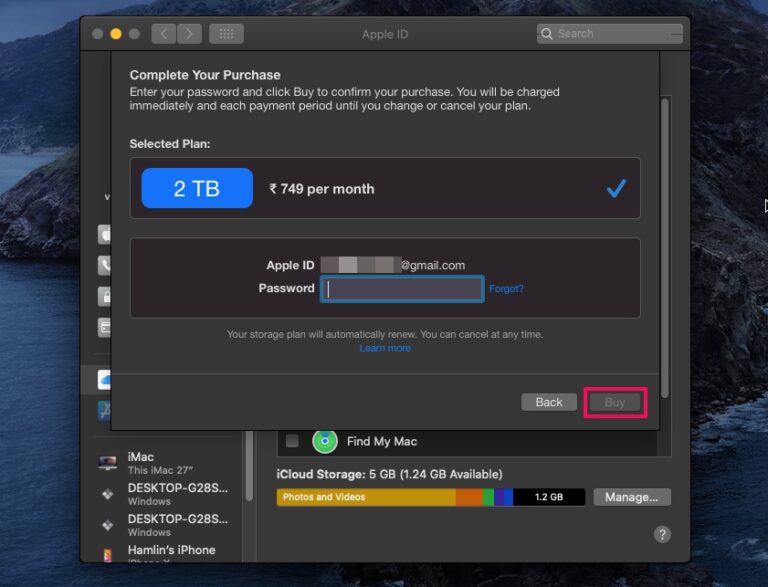
5. According to your preference, you can now choose any of the three paid plans. Click “Next” to proceed to the final step.
6. Type in your Apple ID password and click on “Buy” to confirm and complete your purchase.
That’s all you need to do to upgrade the iCloud Storage Plan on your Mac.
How much does iCloud storage cost?
Apple gives four storage options: 5GB (free); 50GB (99 cents/month); 200GB ($2.99/month); and 2TB ($9.99/month).
You may find it amazing if you subscribe to the Apple one service if you use other services, such as Apple Music or Apple TV+, which may save a few bucks.
- The individual Apple One plan includes 50GB of storage, Music, TV+ and Arcade for $14.95/month.
- The $19.95 Family plan gives you 200GB of storage, Music, TV+, and Arcade and lets you share the plan with up to five others.
- The $29.95 Premier plan provides you with 2TB of storage. It also provides News, Music, TV+, Arcade, and Fitness+ and services can be shared with up to five others.


