To live stream on Twitter, you can use platforms like Twitter’s own live streaming platform, Periscope, or third-party services that integrate with Twitter for live streaming.
Here are general steps you can follow to live stream on X (where “X” could be a website, an application, or any other platform):
Steps to Live Stream on Twitter:
1. Using Twitter’s Live Streaming Platform:
Navigate to your Twitter account or the Twitter app on your device.
Compose a new tweet by clicking on the “Tweet” button.
Click on the camera icon to start a new tweet with media.
Select “Live” to begin live streaming directly on Twitter using Periscope.
2. Using Periscope:
Sign in to your Periscope account with your Twitter credentials.
Click on the camera icon to start a new broadcast.
Add a title and description for your live stream.
Select your privacy settings (public, followers only, private).
Click “Go Live” to start broadcasting on Periscope, which will also be shared on your connected Twitter account.
3. Third-Party Streaming Tools:
Use third-party live streaming tools like OBS Studio, Streamlabs, or Restream to set up live streaming and integrate with Twitter.
Configure the streaming software to connect to your Twitter account for broadcasting.
4. Integrated Services:
Some platforms offer direct integration with Twitter for live streaming. Check if the service you’re using has the option to connect and stream live video to Twitter.
5. Engage with Your Audience:
Interact with viewers during your live stream by responding to comments, questions, and engaging in real-time conversation to enhance the viewing experience.
6. Promote Your Live Stream:
Before going live, promote your upcoming stream on Twitter to notify your followers and build anticipation for your broadcast.
7. Consistent Connection:
Ensure you have a stable internet connection to avoid disruptions during your live stream.
Tips for Successful Live Streaming:
Prepare Your Content: Have a plan for what you’ll be broadcasting and ensure you have any necessary equipment ready.
Engage with Viewers: Encourage viewers to comment and interact during the live stream to make it engaging.
Promote Your Stream: Build excitement by promoting your upcoming live stream to attract a larger audience.
In Conclusion, By following these steps and utilizing the available tools for live streaming on Twitter, you can connect with your audience in real time and share engaging content. Whether you choose to stream directly on Twitter, through Periscope, or via third-party tools, live streaming can be a powerful way to engage with your followers and share content in a more dynamic format.
To automatically post from X (where “X” could be a website, a social media platform, an application, etc.) to Facebook, you can use tools and services that offer integration and automation capabilities.
Here’s a general guide on how you can set up automatic posting to Facebook from various platforms:
Setting Up Automatic Posting to Facebook:
1. Using Facebook’s Official Tools:
Facebook Business Suite: If you are managing a business page, you can use Facebook Business Suite to schedule and automate posts across Facebook and Instagram.
Creator Studio: For creators and publishers, Facebook’s Creator Studio provides tools for scheduling and posting content on Facebook and Instagram.
2. Third-Party Tools and Services:
Buffer, Hootsuite, or Sprout Social: These social media management tools allow you to schedule and automate posts across multiple platforms, including Facebook.
Zapier or IFTTT: Automation platforms like Zapier and IFTTT enable you to create workflows that automatically post content from one platform (Trigger) to Facebook (Action).
3. Website Integration:
If you have a website or blog, you can use plugins like Jetpack for WordPress or social media automation tools to share new posts automatically to your Facebook page.
4. RSS Feeds:
You can use services that allow you to connect an RSS feed to your Facebook page. Whenever there’s a new entry in the feed, it will automatically post to your Facebook page.
5. API Integration:
For developers or advanced users, integrating with Facebook’s Graph API allows for more customized and direct control over posting content to Facebook.
6. Detailed Instructions:
Check the specific platform or tool you’re using for detailed instructions on setting up automatic posting to Facebook. Each service may have slightly different procedures for automation.
Factors to Consider:
Content Quality: Ensure that the content you automate for posting meets the standards of your audience and aligns with your branding.
Scheduling: Consider the best times to post on Facebook to maximize engagement with your audience.
Engagement: Even with automated posts, make sure to engage with your audience by responding to comments and messages promptly.
In conclusion, Automating posts to Facebook can help streamline your social media management and ensure consistent visibility for your content. By using the right tools and services, you can save time and effectively reach your audience without manual effort.
Identifying whether Facebook is experiencing downtime or connectivity issues can help you understand if the problem lies with the platform itself or your device/internet connection.
Here are some methods to determine if Facebook is down:
Ways to Check If Facebook Is Experiencing Downtime:
1. Visit Down Detector:
Access websites like Down Detector (https://downdetector.com/) that monitor the status of various online services, including Facebook. These platforms provide real-time information on service disruptions and outages.
2. Check Facebook’s Official Status Page:
Visit Facebook’s official status page (https://www.facebook.com/business/resources) to see if there are any reported issues or maintenance activities from the company’s end.
3. Monitor Social Media Platforms:
Check Twitter or Reddit for user reports regarding Facebook downtime. Users often share their experiences when a popular platform like Facebook is facing technical difficulties.
4. Use Alternative Devices or Networks:
Try accessing Facebook on different devices or networks to see if the issue persists. If Facebook loads on another device or network, the problem may be specific to your device or connection.
5. Refresh Facebook Several Times:
Sometimes, temporary glitches can cause Facebook to appear down. Refresh the page several times to see if the issue resolves itself.
6. Check Error Messages:
Look for any error messages or notifications when trying to access Facebook. If you receive specific error messages or prompts, they might indicate problems with your connection or Facebook’s servers.
7. Monitor News Websites:
Tech news websites often report on widespread outages affecting popular services like Facebook. Keep an eye on news sources for any updates on Facebook downtime.
Clear Browser Cache: Clear your browser cache and cookies before attempting to access Facebook to rule out any browser-related issues.
Restart Devices: Sometimes, restarting your device can resolve temporary connectivity issues that may be affecting your ability to access Facebook.
Check with Friends: Ask friends or contacts if they are experiencing the same problem accessing Facebook to ascertain if it’s a widespread issue.
In conclusion, By utilizing these methods, you can identify if Facebook is facing downtime or if the issue is specific to your device or network. Tracking official status updates, checking third-party monitoring sites, and monitoring social media can help you stay informed about any disruptions to Facebook’s services.
Dealing with ads while playing games on your iPhone can be disruptive to your gaming experience.
Here are a few strategies you can use to minimize or eliminate ads when playing games on your iPhone:
Tips to Reduce Ads While Gaming:
1. Upgrade to the Premium Version:
Many games offer a premium (paid) version that removes ads and provides additional features. Consider investing in the premium version of your favorite games to enjoy an ad-free experience.
2. Enable Airplane Mode:
Turning on Airplane Mode disconnects your iPhone from the internet, which can prevent ads from loading during gameplay. Keep in mind that enabling Airplane Mode will also disable network-dependent features.
3. Disable Wi-Fi and Cellular Data:
If you don’t want to use Airplane Mode, you can manually disable Wi-Fi and cellular data in your iPhone settings while playing games. This can also prevent ads from loading.
4. Use a Third-Party Ad Blocker:
Install a reputable ad blocker app from the App Store that can help block ads in games and other apps on your iPhone. Make sure to follow the app instructions for proper setup.
5. Play Offline Games:
Consider playing games that do not rely on an internet connection. Offline games typically do not have ads since they do not require online connectivity for gameplay.
6. Opt for Games with Fewer Ads:
Some games have fewer ads or offer an option to reduce ad frequency in exchange for watching longer ads less frequently. Look for games that provide a balance between ads and gameplay.
7. Provide Feedback to Developers:
Reach out to the game developers and provide feedback about the ad frequency. Some developers may offer options to reduce ads based on user feedback.
Additional Suggestions:
Check Game Settings: Some games offer the option to disable ads or reduce ad frequency within the game settings. Explore the settings menu to see if such options are available.
Review App Permissions: Ensure that the games you play do not have unnecessary permissions that might lead to more ads being displayed. Adjust app permissions as needed.
In conclusion, By utilizing these strategies, you can reduce the interruption of ads while playing games on your iPhone and enhance your gaming experience. Whether you opt for the premium version of games, use ad blockers, play offline, or provide feedback to developers, there are various ways to minimize ads during gameplay.
In this article, we’ll explain how to see who has viewed your TikTok videos. It also covers how to see which users have seen your profile page and how many video and profile views you’ve received.
Can You See Who Viewed Your TikTok?
TikTok doesn’t list all the people who have opened your TikToks. But, you can infer who’s watching your videos by monitoring comments and looking through the list of people who have liked and favorited your videos. Of course, this doesn’t include everyone, but it will paint a partial picture of who’s viewing your content. Here’s how:
Click on Inbox at the bottom.
Select Activities.
Click on All activity at the top and then choose the stat you’re looking for: Likes and Favorites or Comments. The people who liked, commented, or favorited your videos are displayed on this page.
How to See TikTok Video Views
You can also check how many views your videos have had. This doesn’t let you see who watched your TikToks but it does provide helpful insight into how your videos are performing. Here’s how to check the view count:
Tap Profile at the bottom of the screen.
Look under the video to see what number is listed. The number represents how many people have viewed that video.
Alternatively, tap the video to see the number of viewers while the video plays back. It’s also possible to see the comment, like, and favorite count here.
How to See Who Viewed Your TikTok Profile Using Profile View
TikTok has a dedicated Profile view section that lists the name of each user who has opened your profile. It’s off by default, but once it’s turned on you’ll see who viewed your profile in the last 30 days which could indicate that these people have watched your TikToks.
By enabling it, other users will also be able to see when you view their profile.
From your Profile tab, tap the footprints icon, right next to the menu button.
Click on Turn on.
You can now view who has looked at your profile in the past 30 days.
How to Disable Profile View
If you’ve changed your mind and would prefer to switch off Profile view, it’s only a few steps away. Here’s what to do.
Go to Profile > Profile view (the footprints).
Click on the settings icon in the top right corner.
Tap the toggle to switch it off.
Note: If you can’t see who has viewed your TikTok profile, there are a few reasons why this may be. Here’s a look at the main ones.
You’re too young. Profile views can only be toggled on if you are 16 or older. If you’re under that age, you can’t switch the feature on.
You have too many followers. It’s only possible to check profile views if you have fewer than 5,000 followers.
Listening to free music online is a great way to discover new songs, artists, and genres without any cost. Here are 12 of the best platforms where you can enjoy free music online:
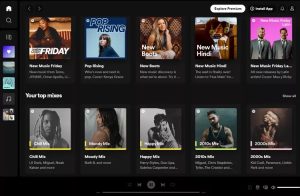
Spotify offers a free tier with ads, allowing you to stream a vast library of songs, albums, and playlists across different genres. It also provides personalized recommendations based on your listening habits.
The free music through Spotify plays through a web browser, mobile device, or desktop manager that you can download to your computer.
YouTube Music offers both a free ad-supported version and a premium subscription. You can explore music videos, official audio tracks, and user-generated content on this platform.
You can find playlists for specific genres, decades, activities, or moods, and categories for kids. YouTube Music also lets you upload your music to listen from anywhere. The site’s home page has personal mixes and handy categories; I’ve seen Mindful instrumentals, Vibe higher, The Holiday Season, All-time essentials, and Living room dance party.
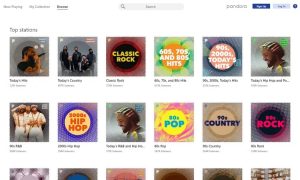
Pandora provides personalized radio stations based on your music preferences. The free version allows you to create stations and discover new tracks while listening to occasional ads.
SoundCloud is a platform where artists and creators upload their music. You can explore a wide range of genres, discover emerging artists, and create playlists for free.
TuneIn offers free access to live radio stations, podcasts, news, and music. You can listen to stations from around the world and explore diverse content.
TuneIn works from a web browser or desktop program on a computer and through mobile apps. Your favorite stations can be stored in your account to have access from all your devices. For more features like fewer ads, you can try TuneIn Premium for 30 days.
Jamendo Music allows you to stream and download music for free. It features a collection of independent artists and creative commons music across various genres.
FMA offers a wide selection of high-quality, legal audio downloads, including tracks from independent artists, for free. You can explore and download music for personal use.
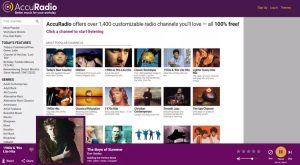
AccuRadio is like other online radio services on this list. Browse for a station by genre, or have them pick a random one if you’re not sure what you want to listen to. You can also view the most popular music for inspiration. There are a handful of mobile apps so that you can listen on multiple devices.
Jango is an internet radio service that allows you to create custom radio stations based on your favorite artists. You can discover new music and artists while listening for free.
Beyond the unlimited listening and minimum commercials, what makes this service great is that you can build custom radio stations by simply picking your favorite band or singer. There are also hundreds of pre-made stations you can look through by genre.
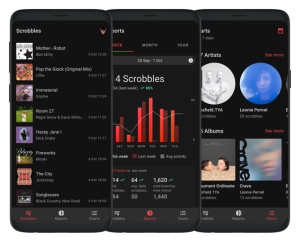
Last.fm offers personalized music recommendations based on your listening history. You can scrobble tracks, explore artists, and listen to free streaming radio.
DatPiff specializes in hip-hop mixtapes and allows you to stream and download mixtapes for free. It features both established and up-and-coming artists in the hip-hop genre.
Mixcloud offers free access to radio shows, DJ mixes, podcasts, and music content across various genres. You can explore a diverse range of audio content for free.
There are Mixcloud apps available for iPhone, iPad, and Android if you want to listen on your phone or tablet. It’s also available for Apple TV. You can pay for more features like zero ads, the ability to rewind, and early access to new features.
These platforms offer a diverse range of music content for you to explore and enjoy without any cost. Whether you’re looking for popular hits, indie artists, live performances, or curated radio stations, these websites provide a wealth of musical experience
Creating content that goes viral is like catching lightning in a bottle, but with the right strategy and approach, you can increase your chances of making an impact.
Here are some tips on how to make your contents go viral online:
1. Understand Your Audience:
Identify your target audience and tailor your content to resonate with their interests, preferences, and behaviors. Understanding what appeals to your audience is key to virality.
2. Create High-Quality and Unique Content:
Produce content that stands out by being original, engaging, and of high quality. Unique and innovative content is more likely to grab attention and be shared.
3. Tap Into Emotions:
Emotional content often elicits strong reactions and encourages sharing. Whether it’s humor, inspiration, nostalgia, or surprise, leveraging emotions can enhance virality.
4. Utilize Visuals and Multimedia:
Incorporate eye-catching visuals, videos, infographics, or gifs to make your content visually appealing and shareable across different platforms.
5. Timing is Key:
Post your content at optimal times when your target audience is most active online. Consider time zones, peak engagement hours, and relevant events or trends.
6. Encourage Engagement:
Prompt your audience to interact with your content through likes, comments, shares, polls, or challenges. Engagement boosts visibility and virality.
7. Harness the Power of Influencers:
Collaborate with influencers or thought leaders in your industry who can help amplify your content to a broader audience and lend credibility to your message.
8. Utilize Trending Topics:
Capitalize on trending hashtags, challenges, or current events to make your content timely and relevant. Trending topics can give your content a boost in visibility.
9. Cross-Promote Across Platforms:
Share your content across multiple platforms and channels to reach a wider audience. Consistent cross-promotion can increase the chances of virality.
10. Monitor and Adapt:
Track the performance of your content, analyze metrics, and be willing to adapt your strategy based on what is resonating with your audience. A willingness to iterate and improve is crucial for virality.
Virality is not guaranteed, so focus on creating valuable and engaging content rather than just aiming for virality.
Stay authentic and true to your brand or message to build long-lasting connections with your audience.
By implementing these tips and staying attuned to your audience and industry trends, you can enhance the chances of making your content go viral online. Keep experimenting, learning, and refining your approach to see what resonates most with your audience.
Playing free online games is a fantastic way to have fun and relax. There are numerous websites offering a wide range of games for all preferences. Here are eight of the best websites where you can play free online games:
Miniclip offers a vast collection of games across various genres, including arcade, sports, puzzles, and multiplayer games. It’s known for its high-quality and addictive titles.
Poki features a diverse selection of free online games, including action, adventure, puzzle, and strategy games. It offers a user-friendly platform for playing games across different categories.
Kongregate hosts a large library of free web games, including popular titles, indie games, and multiplayer experiences. Players can earn badges, rewards, and achievements as they play.
It’s easy to find the perfect game here because once you select a category, you can sort the list to find the most popular games and the games that were added recently; this is great for repeat visitors.
Armor Games offers a wide array of free online games, from action-packed adventures to strategy and puzzle games. The platform features both classic titles and new releases.
Pogo provides a mix of classic and modern games, including card games, puzzle games, and multiplayer titles. Players can compete in tournaments and engage with a vibrant community.
You can play most of the free online games at Pogo without registering, but if you decide to, which is free, you’ll be entered into prize drawings, be able to store your game stats, and earn tokens. Some features are only accessible if you pay for Club Pogo.
Addicting Games lives up to its name with a plethora of addictively fun free games in diverse categories like shooting, racing, and strategy. It offers a mix of well-known and lesser-known titles
A few of the more popular games include The Impossible Quiz, Bowman 2, The World’s Hardest Game, Max Dirt Bike, and Bubble Spinner.
CrazyGames showcases a wide range of free online games, including HTML5, WebGL, and Flash games. Players can enjoy an assortment of genres, from casual to more intense gameplay.
FOG, short for Free Online Games, offers a comprehensive collection of free games, including popular picks and lesser-known gems. The platform covers a broad spectrum of genres to cater to various gaming tastes.
Whether you’re into casual puzzle-solving, intense action-packed adventures, or multiplayer fun, these websites have something for everyone.
Connecting your Chromecast to a hotel room TV can be a bit tricky due to network restrictions and login portals commonly found in hotel Wi-Fi setups. However, with some workarounds and the right equipment, you can still stream content from your Chromecast to the hotel TV.
Here’s a guide on how to get your Chromecast connected to a hotel room TV:
Steps to Connect Chromecast to a Hotel Room TV:
1. Travel Router Method:
Requirements: A travel router (or portable Wi-Fi router) and an Ethernet cable.
Setup:
a. Connect the travel router to the hotel room’s Ethernet port using the Ethernet cable.
b. Power on the travel router and configure it to create a private Wi-Fi network.
Connecting Chromecast:
a. Set up your Chromecast with a mobile hotspot or another Wi-Fi network to which your travel router is connected.
b. Connect your casting device (phone, tablet, or laptop) to the travel router’s Wi-Fi network.
c. Cast content from your device to the Chromecast on the hotel room TV.
2. Mobile Hotspot Method:
Requirements: A mobile device with a hotspot feature and a casting device.
Setup:
a. Turn on the mobile hotspot feature on your smartphone or mobile device.
b. Connect your casting device to the mobile hotspot’s Wi-Fi network.
Connecting Chromecast:
a. Set up your Chromecast with the mobile hotspot network.
b. Cast content from your device to the Chromecast on the hotel room TV. Ensure both devices are on the same network.
3. HDMI Adapter for Screen Mirroring:
Requirements: An HDMI adapter compatible with your casting device (e.g., Lightning to HDMI, USB-C to HDMI).
Setup:
a. Connect the HDMI adapter to your casting device and the hotel room TV.
b. Set the TV input source to the HDMI port where the adapter is connected.
Screen Mirroring:
a. Mirror your casting device’s screen to the hotel room TV using the HDMI adapter to display content from your device.
Use a VPN for added security and privacy when connecting to the hotel Wi-Fi network.
Remember to disconnect and reset all network settings before checking out to protect your data.
By following these methods and workarounds, you can successfully connect your Chromecast to a hotel room TV and enjoy streaming content on a larger screen.
Upgrade your Videocalls: How to Use an iPhone as a Webcam on Windows 11
Do you find yourself in countless video meetings or virtual hangouts? Are you tired of the grainy image quality and unstable connections when using your laptop’s built-in webcam? It’s time to upgrade your videocalls and make a lasting impression using your iPhone as a webcam on Windows 11.
In this article, we will show you how to harness the power of your iPhone’s advanced camera technology to enhance your videocalling experience. With just a few simple steps, you can transform your iPhone into a high-definition webcam, delivering crystal-clear video and exceptional audio quality. Say goodbye to pixelated images and hello to professional-grade videocalls.
Taking advantage of the latest features of Windows 11, we will guide you through the process of setting up your iPhone as a webcam using both wired and wireless methods. Whether you’re using it for work, online classes, or virtual social gatherings, this innovative solution will take your videocalling experience to the next level.
Upgrade your videocalls today and experience the difference of using an iPhone as a webcam on Windows 11. Get ready to make a lasting impression every time you hop on your next video call.
Why use an iPhone as a webcam?
When it comes to videocalls, image quality and stability are paramount. While most laptops come with built-in webcams, they often fall short in terms of resolution and overall performance. This is where using an iPhone as a webcam comes in.
Apple’s iPhones are known for their exceptional camera technology, capable of capturing stunning photos and videos. By utilizing your iPhone’s camera as a webcam, you can take advantage of its superior image quality, advanced autofocus, and image stabilization features. This ensures that your video is clear, sharp, and free from motion blur, even in low-light conditions.
Not only does using an iPhone as a webcam improve the visual aspect of your videocalls, but it also enhances the audio quality. iPhones are equipped with multiple microphones that capture sound from different directions, resulting in clearer and more immersive audio during your calls.
Benefits of using an iPhone as a webcam
There are several benefits to using an iPhone as a webcam on Windows 11. Firstly, the image quality is significantly better compared to most built-in laptop webcams. The higher resolution and advanced camera features of the iPhone result in sharper, more vibrant video.
Secondly, iPhones have excellent low-light performance, thanks to their larger camera sensors and powerful image processing capabilities. This means that even in dimly lit environments, your video will remain clear and well-lit, without the need for additional lighting equipment.
Thirdly, iPhones offer superior autofocus and image stabilization, ensuring that your video remains sharp and steady, even if you move around or make sudden gestures during your videocalls. This eliminates the annoyance of blurry or shaky video that is often associated with laptop webcams.
Lastly, by using an iPhone as a webcam, you have access to a wide range of camera settings and features that can further enhance your videocalling experience. You can adjust exposure, white balance, and other settings to achieve the perfect look for your video, making you stand out from the crowd.
Compatibility requirements
Before you get started, there are a few compatibility requirements you need to be aware of. Firstly, you will need an iPhone running iOS 12 or later, as well as a Windows 11 PC or laptop. Additionally, both your iPhone and Windows 11 device need to be connected to the same Wi-Fi network or via a USB cable for the wired method.
It’s also worth noting that some features and functionality may vary depending on the specific iPhone model you have. For example, newer iPhones may offer additional camera features like portrait mode or deep fusion, which can further enhance the look of your video.
Now that you have checked the compatibility requirements, let’s dive into the process of setting up your iPhone as a webcam on Windows 11.
Setting up your iPhone as a webcam
There are two methods you can use to set up your iPhone as a webcam on Windows 11: the wired method and the wireless method. Each method has its own advantages and considerations, so let’s explore both options.
### 1. Using a wired connection
To use your iPhone as a webcam using a wired connection, you will need a USB cable that is compatible with your iPhone model. Here’s how to set it up:
1. Connect your iPhone to your Windows 11 PC or laptop using the USB cable.
2. On your iPhone, open the App Store and search for a webcam app. There are several options available, such as EpocCam, iVCam, and DroidCam.
3. Download and install the webcam app of your choice on your iPhone.
4. Launch the webcam app and follow the on-screen instructions to connect it to your Windows 11 device.
5. Once connected, select your iPhone as the webcam source in your preferred video conferencing or streaming application.
Using a wired connection ensures a stable and reliable connection between your iPhone and Windows 11 device. It also allows for faster data transfer, resulting in minimal latency and smoother video playback. However, keep in mind that the range of movement is limited by the length of the USB cable.
### 2. Using a wireless connection
If you prefer a more flexible setup that allows for greater mobility, you can use your iPhone as a webcam using a wireless connection. Here’s how to do it:
1. On your iPhone, open the App Store and search for a webcam app that supports wireless connection. Some popular options include EpocCam, iVCam, and DroidCam.
2. Download and install the webcam app of your choice on your iPhone.
3. Install the corresponding desktop client or driver on your Windows 11 PC or laptop. The app will provide instructions on how to do this.
4. Launch the webcam app on both your iPhone and Windows 11 device.
5. Follow the on-screen instructions to connect your iPhone and Windows 11 device via Wi-Fi.
6. Once connected, select your iPhone as the webcam source in your preferred video conferencing or streaming application.
Using a wireless connection offers more freedom of movement, allowing you to position your iPhone at the perfect angle without being constrained by cables. However, keep in mind that wireless connections may be more prone to interference and may introduce slight latency, resulting in a small delay between your actions and the video feed.
Using third-party apps for iPhone webcam functionality
To fully utilize your iPhone as a webcam on Windows 11, you will need to install a third-party app that provides webcam functionality. There are several apps available on the App Store that offer this feature, each with its own set of features and compatibility.
One popular app is EpocCam, which is available for both iOS and Windows. EpocCam allows you to use your iPhone as a webcam with various video conferencing and streaming applications, including Zoom, Microsoft Teams, OBS Studio, and many more. It offers high-quality video and audio, as well as adjustable settings to fine-tune your videocalling experience.
Another option is iVCam, which provides similar functionality to EpocCam. iVCam supports both wired and wireless connections, allowing you to choose the setup that suits your needs. It also offers additional features like background blur and virtual green screen, which can enhance the visual appeal of your video.
DroidCam is another popular choice that is available for both Android and iOS devices. DroidCam offers both a free and pro version, with the pro version unlocking additional features like HD video and no ads. It supports both wired and wireless connections and is compatible with a wide range of video conferencing and streaming applications.
No matter which app you choose, make sure to read user reviews and check compatibility with your specific iPhone model and Windows 11 device. This will ensure a seamless experience and minimize the chances of compatibility issues.
Adjusting settings for optimal video quality
Once you have set up your iPhone as a webcam on Windows 11, you can further enhance the video quality by adjusting various settings. Most webcam apps offer options to adjust exposure, white balance, and autofocus, allowing you to fine-tune the look of your video.
To achieve the best video quality, follow these tips:
1. Make sure your iPhone is positioned at eye level or slightly above, as this provides the most flattering angle.
2. Ensure that the lighting conditions are adequate. Avoid harsh overhead lighting or backlighting, as this can result in unflattering shadows or silhouettes.
3. Experiment with different camera settings to find the optimal balance of exposure and white balance. Adjusting these settings can greatly improve the overall look of your video.
4. If your webcam app supports it, enable autofocus and image stabilization to ensure that your video remains sharp and steady.
By taking the time to adjust these settings, you can elevate your videocalling experience and create a more professional and engaging presence during your calls.
Troubleshooting common issues
While setting up your iPhone as a webcam on Windows 11 is relatively straightforward, you may encounter some common issues along the way. Here are a few troubleshooting tips to help you resolve them:
1. If your iPhone is not recognized as a webcam by your video conferencing or streaming application, make sure that you have selected the correct video source within the app’s settings.
2. If you are experiencing lag or latency, try reducing the video quality or switching to a wired connection if you are using a wireless setup.
3. If the video feed appears pixelated or blurry, ensure that your iPhone’s camera lens is clean and free from smudges or fingerprints.
4. If you are experiencing audio issues, check the audio settings within your video conferencing or streaming application to ensure that the correct microphone source is selected.
If you continue to experience issues, consult the user manual or support documentation provided by the webcam app you are using. They may have additional troubleshooting steps specific to their app.
Alternative webcam options for Windows 11
While using an iPhone as a webcam on Windows 11 offers numerous benefits, there are alternative webcam options available if you don’t have an iPhone or prefer a dedicated webcam device.
One popular option is the Logitech C920, which is widely regarded as one of the best webcams for Windows 11. It offers high-definition video, excellent low-light performance, and a wide field of view, making it suitable for a variety of videocalling scenarios.
Another option is the Razer Kiyo, which features a built-in ring light that ensures optimal lighting in any environment. The Kiyo also offers adjustable video settings and a wide-angle lens, perfect for group calls or streaming.
Both the Logitech C920 and Razer Kiyo are plug-and-play devices, meaning they require no additional software or drivers to function. Simply connect them to your Windows 11 device via USB, and you’re good to go.
Recommended accessories for iPhone webcam setup
To further enhance your iPhone webcam setup, consider investing in the following accessories:
1. Tripod or phone stand: A tripod or phone stand allows you to position your iPhone at the perfect angle, ensuring a stable and steady video feed.
2. Lighting equipment: While iPhones have excellent low-light performance, adding additional lighting equipment can further enhance the visual quality of your video. Consider using a ring light or a softbox to achieve professional-looking lighting.
3. External microphone: While iPhones have high-quality microphones, an external microphone can provide even better audio quality. Consider investing in a USB microphone or a lavalier microphone for clear and crisp audio during your videocalls.
These accessories can elevate your videocalling setup to the next level, making you stand out and deliver a more professional and engaging presence.
Conclusion
Upgrade your videocalls today and experience the difference of using an iPhone as a webcam on Windows 11. By harnessing the power of your iPhone’s advanced camera technology, you can transform your videocalling experience into a professional-grade one, with crystal-clear video and exceptional audio quality.
Whether you choose to use a wired or wireless setup, the process of setting up your iPhone as a webcam on Windows 11 is relatively simple and straightforward. By following the steps outlined in this article and utilizing third-party webcam apps, you can unlock the full potential of your iPhone and create a more immersive and engaging videocalling experience.
Don’t settle for grainy images and unstable connections. Upgrade your videocalls today and make a lasting impression with an iPhone as your webcam on Windows 11. Say goodbye to pixelated images and hello to professional-grade videocalls. Get ready to wow your colleagues, classmates, and friends with crystal-clear video and exceptional audio quality.